
What Is the Best Arterial Line Kit in 2026?
What Is the Best Arterial Line Kit in 2026? The answer depends on clinical purpose, not packaging alone. A reliable arterial line kit should support accurate pressure monitoring, smooth insertion, secure fixation, and clear visualization. It should also reduce unnecessary handling near the sterile field.
Recent reports from Grand View Research and Fortune Business Insights show continued growth in arterial catheters and vascular access devices. Their analyses connect demand with intensive care expansion, surgical monitoring, and minimally invasive procedures. However, market growth does not prove clinical superiority. That distinction matters.
The operating room tells a different story. A kit may look complete, yet lack a dependable needle, low-dead-space tubing, or a practical dressing. Small details become obvious when the patient moves, the monitor waveform dampens, or blood reaches the connector too quickly. Infection prevention remains central. The World Health Organization’s Global Report on Infection Prevention and Control stresses consistent systems, training, and safer clinical practices.
Vascular-access specialist Nancy Moureau has repeatedly emphasized, “The right device, in the right patient, for the right reason, at the right time.” That principle applies here. The best arterial line kit is not automatically the most expensive option. It must match vessel size, clinician experience, monitoring demands, and local protocols.
There is no universal winner.
This guide compares 2026 arterial line kits through practical criteria: component quality, insertion control, sampling design, securement, transparency, compatibility, and total use cost. Some conclusions remain debatable. That is useful. Product claims deserve careful checking against published evidence, regulatory records, and real bedside performance.
Arterial Line Kits: Definition, Purpose, and Core Components
What Is the Best Arterial Line Kit in 2026?
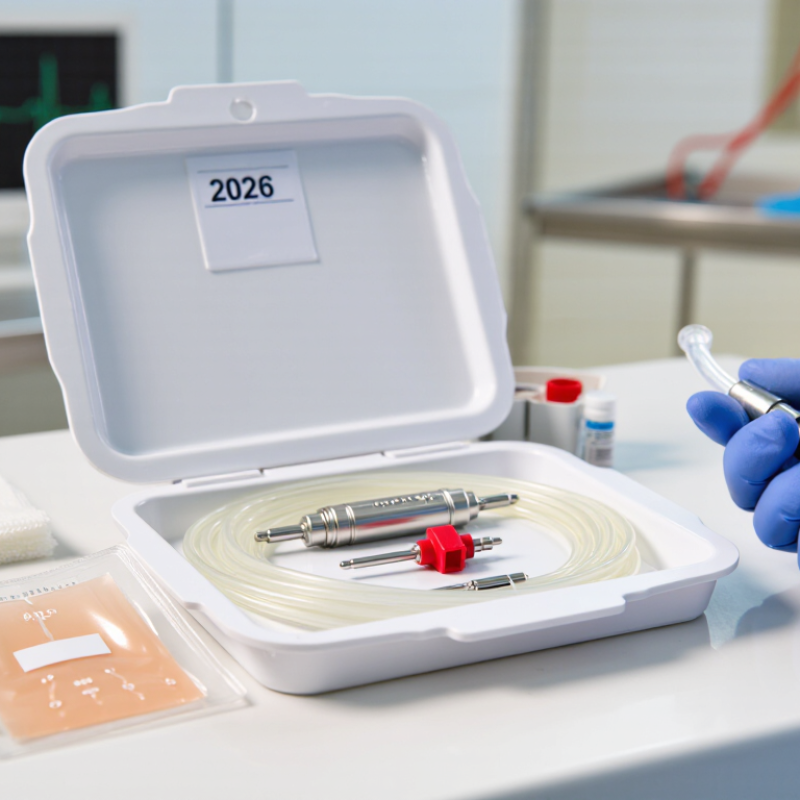
An arterial line kit supports continuous blood-pressure monitoring and repeated arterial blood sampling. Its core component is usually a sterile arterial catheter, often supplied with a needle or guidewire. The kit may also include extension tubing, a needleless connector, flush components, dressing materials, sterile gloves, a drape, and skin antiseptic. Some kits include pressure tubing, but the transducer may be supplied separately.
Selection should focus on clinical fit, not packaging alone. The catheter should provide reliable blood flow while limiting insertion trauma. Clear connectors help clinicians see air bubbles and blood movement. Securement materials should resist movement during patient transfers. The CDC’s Guidelines for the Prevention of Intravascular Catheter-Related Infections emphasize aseptic technique, appropriate skin preparation, and regular assessment of catheter necessity.
The wider safety context is serious. WHO’s 2022 Global Report on Infection Prevention and Control estimated healthcare-associated infections in 7 of 100 acute-care patients in high-income countries, and 15 of 100 patients in low- and middle-income countries. These figures are not arterial-line-specific, so applying them directly would be misleading.
Still, they show why every component matters. A kit can contain excellent parts and still fail through poor labeling, awkward connections, or rushed insertion. I would also question kits with unnecessary extras. More components can increase waste and confusion. In practice, the best kit is the one that matches the procedure, supports sterile handling, and remains intuitive under pressure.
How to Compare Arterial Line Kit Types and Configurations
Choosing the best arterial line kit in 2026 starts with the procedure, not the catalog. Compare catheter type, gauge, length, and insertion site for each patient group. A short radial catheter may suit routine monitoring, while deeper access can require longer designs. Needle visibility matters when the target vessel is small or difficult to palpate. Check whether the kit includes a guidewire, introducer, extension tubing, flush device, and securement materials. Fewer separate components can reduce setup time, but only if staff understand the configuration well.
Assess pressure accuracy across the complete system. Rigid, low-compliance tubing usually supports clearer waveform transmission than flexible tubing. Look for secure connections, clear labels, protective caps, and packaging that supports sterile handling. A closed sampling arrangement may reduce exposure during blood collection, depending on local protocol. I would not treat every safety feature as automatically useful. Extra parts can create clutter, delay access, or encourage incorrect assembly. Review validation data, instructions for use, training needs, and monitor compatibility. Compare total cost per procedure, not only the purchase price. That distinction is easy to miss.
Tips: Place two sample kits on a clean trolley and time a simulated setup. Record priming volume, connection errors, waveform quality, and waste. Ask nurses and clinicians what slows them down during urgent insertion. Trial results may challenge the initial preference. Recheck performance after several shifts, because a kit that feels intuitive on day one may not remain so. Choose the configuration that fits your patients, workflow, and documented infection-control practices.
Key Selection Criteria for Clinical Safety and Performance
What Is the Best Arterial Line Kit in 2026?
The best arterial line kit is not defined by the largest component list. It should support clean insertion, stable pressure monitoring, and predictable removal. CDC guidance emphasizes aseptic technique, skin preparation, and daily assessment of intravascular devices. These steps matter because the WHO Global Report on Infection Prevention and Control (2022) found healthcare-associated infections affect about 7 in 100 acute-care patients in high-income countries. A kit should therefore include secure connectors, clear labels, sterile barriers, and packaging that opens without contaminating key parts.
Performance depends on more than catheter length. Check catheter kink resistance, flashback visibility, guidewire control, and connection security. The monitoring set should limit dead space and maintain reliable waveform transmission. AAMI ST108:2023 highlights water quality and contamination control for medical device reprocessing, while ISO 10555-1 addresses essential requirements for intravascular catheters. These standards do not choose a kit for clinicians, but they create a useful evaluation frame. Small details matter. A readable pressure scale can prevent an avoidable delay.
Clinical teams should also review failure data, training time, and disposal steps. Compare first-attempt success, accidental dislodgement, leakage, and alarm frequency across real cases. Procurement decisions often rely too heavily on price. That is imperfect. A cheaper kit may consume more staff time or create more troubleshooting. Conversely, extra components can increase clutter and confusion. Test the kit with gloves, low lighting, and a crowded bedside. The ideal choice may still fail when instructions are unclear or workflow changes.
Leading Arterial Line Kit Features to Evaluate in 2026
What Is the Best Arterial Line Kit in 2026?
Leading Arterial Line Kit Features to Evaluate in 2026
The best arterial line kit should support accurate monitoring and controlled bedside workflow. Look for a clear catheter, secure needle protection, and low-resistance tubing. A closed blood-sampling pathway can reduce unnecessary disconnections during repeated testing. The kit should also include a reliable flush device and visible air-removal points. Small bubbles can distort readings and create avoidable clinical risk.
Infection control deserves equal attention. The WHO 2022 global report estimated healthcare-associated infections affect 7 in 100 acute-care patients in high-income countries. That figure rises to 15 in lower- and middle-income countries. Therefore, sterile packaging, intuitive opening, and minimal handling are practical evaluation points. CDC guidance recommends aseptic technique and sterile gloves for arterial catheter insertion. Compatibility with pressure transducers and ISO 11070:2014 requirements should also be checked. A kit may look complete, yet lack a needed connector.
Tips: Compare setup time with real clinicians, not sales claims. Test sampling access with gloves. Check whether labels remain readable under wet lighting. Review waste volume, because extra components increase disposal costs. Ask for lot traceability and documented shelf-life data. I would not choose the lowest-priced kit automatically. However, head-to-head evidence comparing complete kits remains limited, so local simulation testing still matters. A practical weakness may appear only after several blood draws.
Best Practices for Setup, Monitoring, and Replacement
What Is the Best Arterial Line Kit in 2026?
The best arterial line kit supports a clean setup, reliable monitoring, and safe replacement. Choose a kit with a compatible catheter, sterile drape, needle, guidewire, flush system, and pressure tubing. Every component should connect securely and allow clear blood sampling. Confirm the catheter size, patient condition, and local clinical protocol before opening the package.
Position the patient comfortably, then prepare the skin with an approved antiseptic. Maintain sterile technique throughout insertion. After connection, level the transducer with the phlebostatic axis and zero it to atmospheric pressure. Check the waveform, pressure bag, tubing, and insertion site. A dampened waveform may reflect air, clotting, loose connections, or incorrect leveling. Do not trust numbers alone. Assess the patient and the clinical picture.
Tips: Label lines clearly. Keep tubing visible. Recheck the waveform after repositioning. Inspect the site at regular intervals for bleeding, swelling, coolness, color changes, or infection. Replace the line when it is no longer clinically needed, becomes contaminated, malfunctions, or shows concerning site changes. Follow institutional policy rather than using an automatic schedule. Even experienced clinicians can overlook a small loose connection during a busy handover. A brief pause helps. Document the assessment, waveform quality, site condition, and reason for replacement. Proper training and direct supervision remain essential for safe arterial monitoring.
| Evaluation Area | Recommended Kit Feature or Target | Why It Matters | Setup and Monitoring Practice | Replacement or Safety Guidance |
|---|---|---|---|---|
| Catheter Selection | Short, radiopaque arterial catheter in an appropriate gauge and length; use the smallest size that provides reliable waveform quality and blood sampling. | Smaller devices can reduce vessel trauma while still supporting continuous pressure monitoring. | Confirm the indication, assess distal perfusion, and select the insertion site according to patient condition and local policy. | Remove promptly when invasive arterial monitoring is no longer clinically necessary. |
| Insertion Site | Prefer a site with a palpable pulse and adequate collateral circulation, commonly the radial artery when clinically appropriate. | Site selection affects access success, ischemic risk, infection risk, and patient mobility. | Use aseptic technique, skin antisepsis with an appropriate antiseptic agent, sterile gloves, and a sterile field. | Inspect for bleeding, hematoma, swelling, coolness, discoloration, pain, numbness, or reduced distal perfusion. |
| Pressure Tubing | Low-compliance, stiff pressure tubing with minimal dead space and secure luer connections. | Low-compliance tubing improves dynamic response and helps preserve waveform fidelity. | Prime the entire system with compatible sterile fluid, remove all air, and check every connection before use. | Replace immediately if contaminated, disconnected, leaking, cracked, visibly soiled, or suspected of malfunction. |
| Flush System | Pressurized isotonic flush solution using a pressure bag or approved automated flush device; avoid air in the circuit. | Maintains catheter patency and supports accurate pressure transmission. | Use the prescribed solution and pressure setting. Confirm the flush device is functioning and the bag is adequately inflated. | Change solution and disposable components according to institutional policy and the solution’s expiration requirements. |
| Transducer | Disposable pressure transducer with a visible fluid path and secure connection to the monitoring cable. | Accurate transduction is essential for dependable systolic, diastolic, and mean arterial pressure values. | Keep the transducer upright or in the manufacturer-specified position and protect the system from contamination. | Replace when contaminated, damaged, or no longer accurate; follow the product instructions and local policy. |
| Leveling and Zeroing | Level the transducer to the right atrium reference point, approximately the phlebostatic axis, and zero to atmospheric pressure. | A vertical height error can create a clinically significant pressure-measurement error. | Level and zero before initial readings, after repositioning, and whenever values do not match the clinical picture. | Recheck after bed-height changes, patient repositioning, transport, or any system disturbance. |
| Waveform Quality | Clear arterial waveform with a rapid upstroke, identifiable dicrotic notch when visible, and minimal artifact. | Waveform distortion can cause inaccurate pressure interpretation even when the numeric value appears plausible. | Perform a fast-flush or square-wave test when damping or resonance is suspected. Check for air, clot, kinks, loose connections, and excessive tubing length. | Correct the mechanical problem before replacing the catheter. Replace affected components if patency or sterility cannot be restored. |
| Sampling Access | Needleless or closed sampling port with a disinfectable connector and minimal dead space. | Reduces blood loss, exposure risk, and the number of open-system manipulations. | Disinfect the access port using the facility-approved antiseptic and allow it to dry before every access. | Replace the port or connector if damaged, visibly contaminated, leaking, or unable to maintain a closed system. |
| Securement and Dressing | Sutureless or suture-based securement appropriate for the site, plus a sterile transparent semipermeable dressing or sterile gauze dressing. | Securement limits accidental dislodgement and dressing integrity helps reduce contamination. | Keep the insertion site visible when possible. Document the site condition, dressing condition, and catheter depth. | Change the dressing immediately if damp, loose, visibly soiled, or compromised. Follow facility policy for routine dressing intervals. |
| Monitoring Frequency | Continuous waveform and pressure display with documented site and system checks at clinically appropriate intervals. | Early recognition of damping, accidental disconnection, bleeding, infection, or distal ischemia improves safety. | Assess waveform, mean pressure, alarm limits, insertion site, distal circulation, tubing, and flush system during each patient assessment. | Escalate unexpected changes promptly; do not rely on the numeric value alone when the waveform is abnormal. |
| Infection Prevention | Integrated sterile components, minimal connection points, and a closed system whenever feasible. | Every connection and manipulation is a potential contamination opportunity. | Perform hand hygiene, use aseptic non-touch technique, disinfect access points, and avoid unnecessary line entry. | Remove the catheter if infection is suspected and obtain cultures or other investigations according to clinical policy. |
| Routine Replacement | Use clinically indicated replacement rather than automatic routine replacement of the arterial catheter. | Routine replacement without an indication adds procedures and may increase complications without improving outcomes. | Evaluate daily whether invasive arterial monitoring remains necessary. | Replace or remove for infection, ischemia, persistent malfunction, dislodgement, thrombosis, or loss of clinical indication. |
| Tubing and Transducer Replacement | Use a documented change schedule based on infection-control guidance, manufacturer instructions, and institutional policy. | Time-based replacement requirements differ by component and clinical setting. | Label the system with the date and time of setup, and record replacements in the clinical record. | For continuously used pressure-monitoring systems, many infection-control protocols specify replacement at intervals no more frequent than every 96 hours unless contamination or malfunction requires earlier replacement. |
| Kit Usability | Clearly labeled components, standardized connections, compact packaging, and an easy-to-follow setup sequence. | Standardization reduces setup omissions, connection errors, and time to monitoring. | Use a checklist covering indication, patient identification, consent where applicable, site assessment, priming, leveling, zeroing, and alarm setup. | Remove expired or damaged components from stock and maintain traceability for opened kits. |
| Clinical decisions should follow current institutional protocols, infection-prevention requirements, manufacturer instructions, and the patient’s condition. The catheter, tubing, transducer, flush solution, and dressing should be replaced immediately when sterility, integrity, patency, or measurement accuracy is compromised. | ||||
Related Posts
-
Top Arrow Arterial Line Kit Benefits and Usage in Intensive Care Units
-

Arterial Line Kit Highlighted at China Import Export Fair 139?
-
China Best Arrow Arterial Line Kit for Global Buyers?
-

Discover the Best Argon Suppliers in Athens TX Today
-

What is a Bone Marrow Biopsy Needle and How is it Used?
-
How to Safely Remove IVC Filters and What You Need to Know